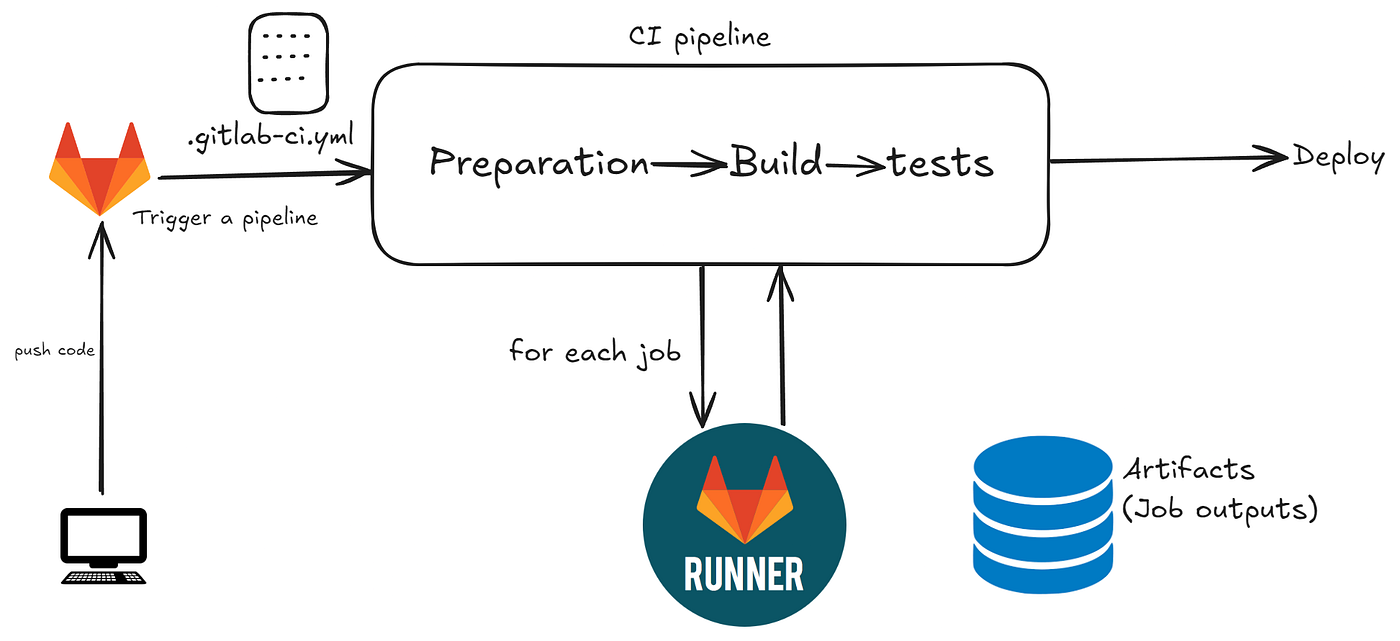
前提: 有一个部署在 AWS ec2 实例上的 gitlab ,并有管理这个账号的相关权限。
开启 Job Artifacts, 并使用 S3 bucket
### Job Artifacts
# gitlab_rails['artifacts_enabled'] = true
# gitlab_rails['artifacts_path'] = "/var/opt/gitlab/gitlab-rails/shared/artifacts"
###! Job artifacts Object Store###! Docs: https://docs.gitlab.com/ee/administration/job_artifacts.html#using-object-storage
# gitlab_rails['artifacts_object_store_enabled'] = false
# gitlab_rails['artifacts_object_store_proxy_download'] = false
# gitlab_rails['artifacts_object_store_remote_directory'] = "artifacts"
# gitlab_rails['artifacts_object_store_connection'] = {
#   'provider' => 'AWS',
#   'region' => 'eu-west-1',
#   'aws_access_key_id' => 'AWS_ACCESS_KEY_ID',
#   'aws_secret_access_key' => 'AWS_SECRET_ACCESS_KEY',
#   # # The below options configure an S3 compatible host instead of AWS
#   # 'aws_signature_version' => 4, # For creation of signed URLs. Set to 2 if provider does not support v4.
#   # 'endpoint' => 'https://s3.amazonaws.com', # default: nil - Useful for S3 compliant services such as DigitalOcean Spaces
#   # 'host' => 's3.amazonaws.com',
#   # 'path_style' => false # Use 'host/bucket_name/object' instead of 'bucket_name.host/object'
# }
gitlab_rails['artifacts_enabled'] = true
gitlab_rails['artifacts_object_store_enabled'] = true
gitlab_rails['artifacts_object_store_remote_directory'] = "<gitlab-artifacts-bucket>"
gitlab_rails['artifacts_object_store_connection'] = {
  'provider' => 'AWS',
  'region' => 'ap-east-1',
  'use_iam_profile' => true,
}使用角色向 Amazon EC2 实例上运行的应用程序授予权限。
To set up an instance profile:
-
Create an IAM role with the necessary permissions. The following example is a role for an S3 bucket named
test-bucket:JSONCopy to clipboard
{ "Version": "2012-10-17", "Statement": [ { "Effect": "Allow", "Action": [ "s3:PutObject", "s3:GetObject", "s3:DeleteObject" ], "Resource": "arn:aws:s3:::artifacts-bucket/*" }, { "Effect": "Allow", "Action": [ "s3:ListBucket" ], "Resource": "arn:aws:s3:::artifacts-bucket" } ] } -
Attach this role to the EC2 instance hosting your GitLab instance.
-
Set the
use_iam_profileGitLab configuration option totrue.
加载配置并重启 gitlab
# 加载配置
sudo gitlab-ctl reconfigure

# 重启
Runners – instance runner/shared runners
三种 runner 类型
GitLab Runner has the following types of runners, which are available based on who you want to have access:
- Instance runners are available to all groups and projects in a GitLab instance.
- Group runners are available to all projects and subgroups in a group.
- Project runners are associated with specific projects. Typically, project runners are used by one project at a time.
To create an instance runner:
- On the left sidebar, at the bottom, select Admin.
- Select CI/CD > Runners.
- Select New instance runner.
- Select the operating system where GitLab Runner is installed.
- In the Tags section, in the Tags field, enter the job tags to specify jobs the runner can run. If there are no job tags for this runner, select Run untagged.
Run GitLab Runner in a container
run
docker run -d --name gitlab-runner --restart always \
  -v /app/gitlab-runner/config:/etc/gitlab-runner \
  -v /var/run/docker.sock:/var/run/docker.sock \
  gitlab/gitlab-runner:v18.2.0
register
$ sudo docker exec -it gitlab-runner /bin/bash  # 进入 runner 容器,进行注册

$ gitlab-runner register  --url <URL> --token <TOKEN> # 在 runner 容器注册
Enter an executor:
docker

Enter the default Docker image (for example, ruby:3.3):
alpine:latest
Caching
缓存与 artifacts 的区别 缓存用于依赖项,例如从互联网下载的包。缓存存储在 GitLab Runner 的安装位置,如果启用了分布式缓存,则会上传到 S3。
使用 artifacts 在阶段之间传递中间构建结果。Artifacts 由作业生成,存储在 GitLab 中,可以下载。
artifacts和缓存都定义了相对于项目目录的路径,并且不能链接到项目目录之外的文件。
对于 Docker 执行器,本地版本缓存在 Docker 卷: docker volume ls

留言